In this guide, we will build a data pipline that moves data between a Kafka topic and a Postgres table. We will also use Docker to run local instances of Apache Kafka and Postgres.
Prerequisites
Before you get started, you'll need:
- An instance of Conduit deployed or running locally.
- Docker and Docker Compose installed on your machine.
Creating Local Resources
For this guide, we'll start by running a few Docker containers for Apache Kafka and Postgres to run the data pipeline. If you have resources you can move to Assemble The Pipeline.
You may find the *.yml files on GitHub.
Start Kafka Container
To run Kafka locally, create a new folder and kafka-docker-compose.yml file.
mkdir -p ~/resources
cd ~/resources
touch kafka-docker-compose.yml
In the kafka-docker-compose.yml file, add the following lines:
version: '2'
services:
    zookeeper:
        image: confluentinc/cp-zookeeper:7.0.0
        environment:
            ZOOKEEPER_CLIENT_PORT: 2181
            ZOOKEEPER_TICK_TIME: 2000

    resources:
        image: confluentinc/cp-kafka:7.0.0
        depends_on:
            - zookeeper
        ports:
            - 9092:9092
        environment:
            KAFKA_BROKER_ID: 1
            KAFKA_ZOOKEEPER_CONNECT: zookeeper:2181
            KAFKA_ADVERTISED_LISTENERS: PLAINTEXT://kafka:29092,PLAINTEXT_HOST://localhost:9092
            KAFKA_LISTENER_SECURITY_PROTOCOL_MAP: PLAINTEXT:PLAINTEXT,PLAINTEXT_HOST:PLAINTEXT
            KAFKA_INTER_BROKER_LISTENER_NAME: PLAINTEXT
            KAFKA_OFFSETS_TOPIC_REPLICATION_FACTOR: 1
Then, you may start the Kafka services with:
docker-compose -f ~/resources/kakfa-docker-compose.yml up -d
This will run your Kafka cluster in the background.
If you want to see the process, remove the -d flag and you’ll get the raw logs from your cluster.
With the above configuration, your Kafka URI will be available at:
localhost:9092
Start PostgreSQL
To run PostgresSQL locally, create a new Docker compose file for Postgres:
touch postgres-docker-compose.yml
In the postgres-docker-compose.yml file, add the following lines:
version: '2'
services:
    pg-0:
        image: docker.io/bitnami/postgresql
        ports:
            - 5432:5432
        volumes:
            - pg_0_data:/bitnami/postgresql
        environment:
            - POSTGRESQL_POSTGRES_PASSWORD=meroxaadmin
            - POSTGRESQL_USERNAME=meroxauser
            - POSTGRESQL_PASSWORD=meroxapass
            - POSTGRESQL_DATABASE=meroxadb

volumes:
    pg_0_data:
        driver: local
With the above configuration, your Postgres URI will be:
postgres://meroxauser:meroxapass@localhost:5432/meroxadb?sslmode=disable
The PostgreSQL connector has CDC features enabled by default. If you’re bringing your own URI, make sure you connect to the manager instance, not the replica instance of PostgreSQL server.
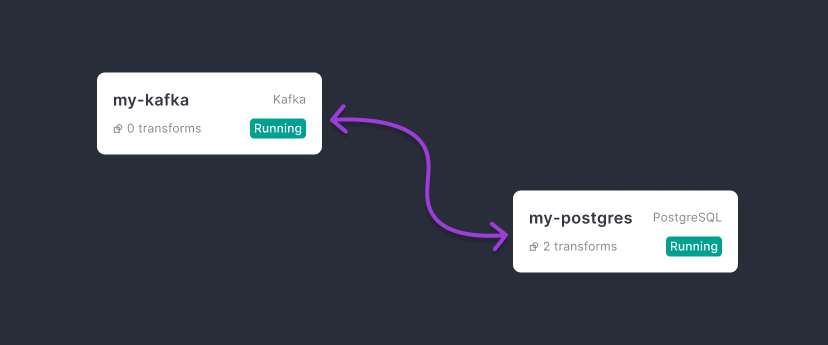
Assemble the pipeline
Now that we’ve stood up all of our necessary sources, we can start assembling the final pipeline.
Make sure you have Conduit running and you can access the Conduit UI.
We will create our Kafka source and then a Postgres destination, then we can hit the start button. 🔘
Create your Kafka source
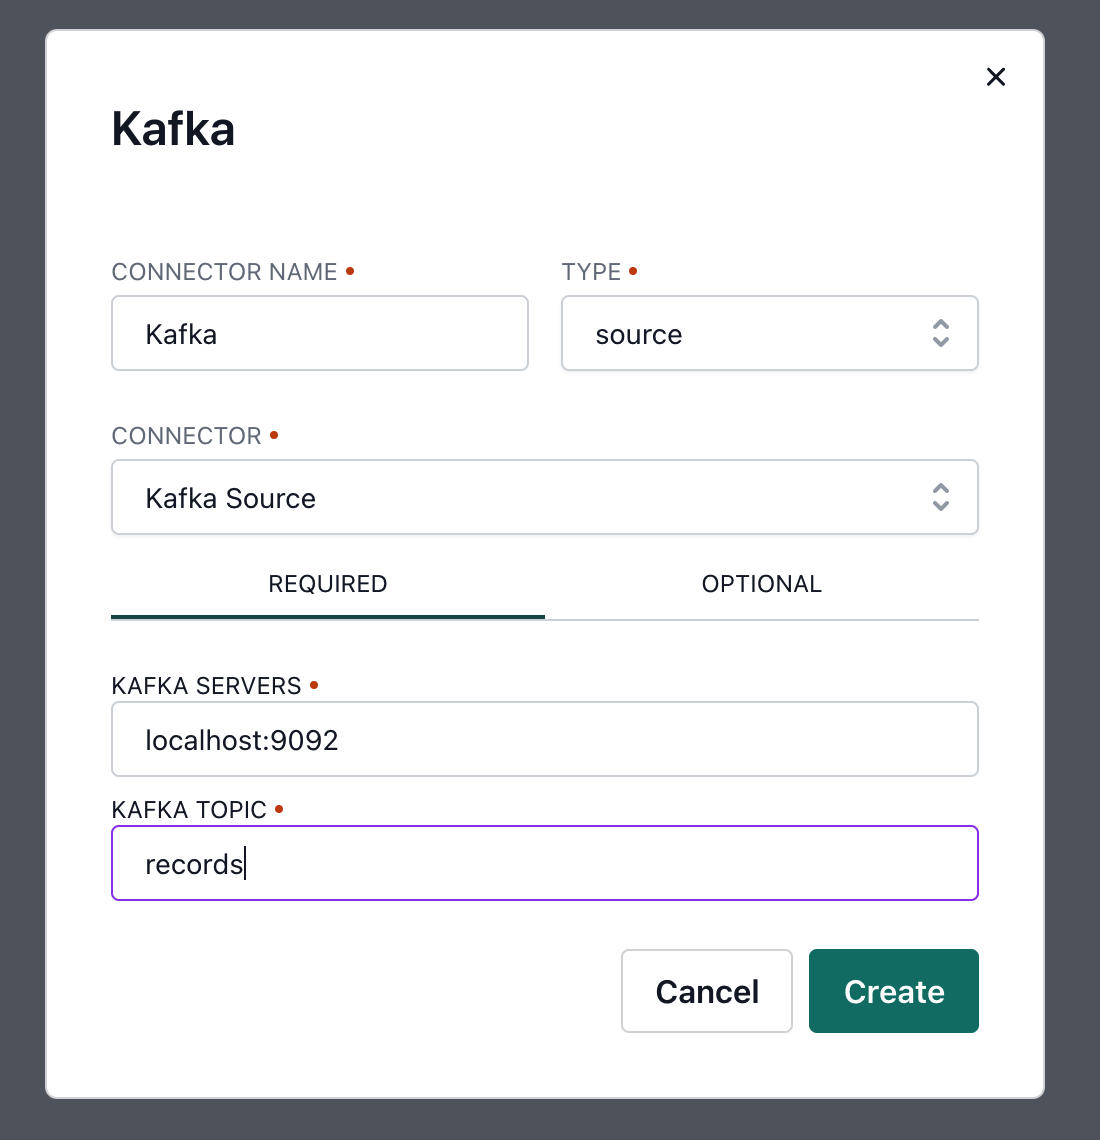
Make sure to set your servers and topic correctly. We have entered in the defaults from our docker-compose files.
Create your Postgres destination
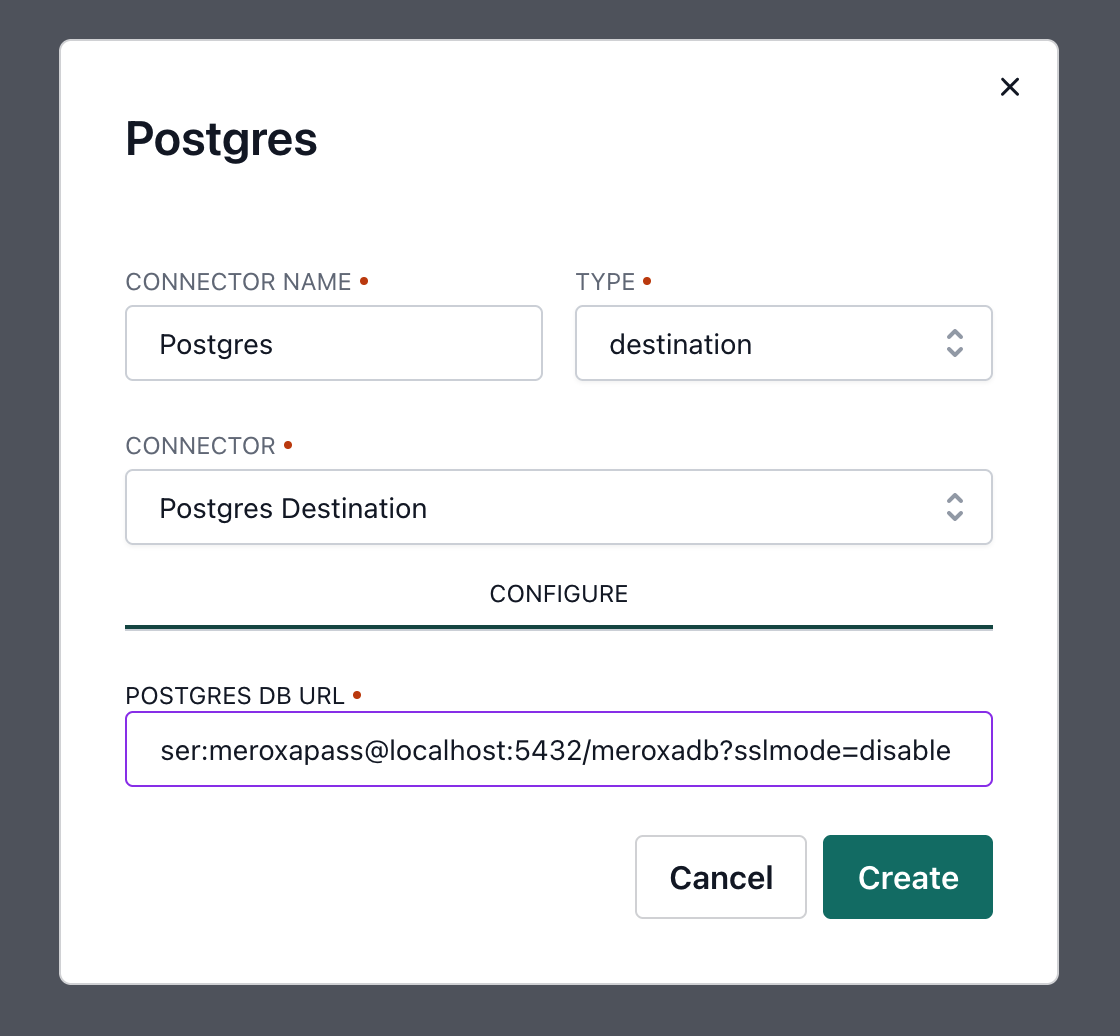
Make sure to double check your PostgreSQL URL. 😅
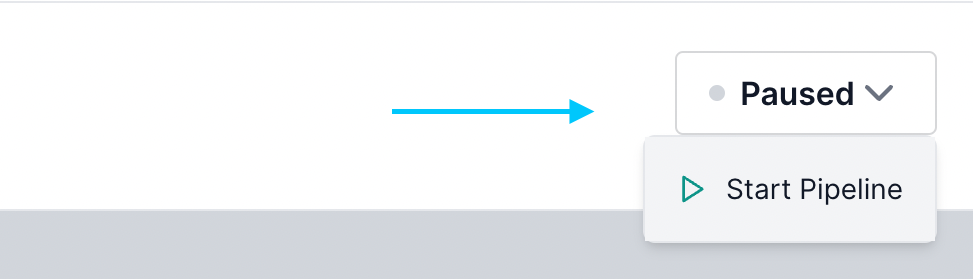
Start the pipeline
Now, it's time to start your pipeline.
To start, click the pipeline status drop-down in the top right and select "Start".
Producing Messages to Kafka
Next, using your preferred Kafka Client, we can produce messages to Kafka.
For example, if we were using Node.js:
const { Kafka } = require('kafkajs')

const kafka = new Kafka({
    clientId: 'my-app',
    brokers: ['127.0.0.1:9092'],
})

const run = async () => {
    const producer = kafka.producer()

    await producer.connect()
    await producer.send({
        topic: 'test-topic',
        messages: [
            { value: 'Hello KafkaJS user!' },
        ],
    })

    await producer.disconnect()
}

run();
Once you have messages in your Kafka topic, you should see Conduit immediately start reading them out to a table in Postgres.
We can't wait to see what you build.
What's Next?
Here are some resources to help you continue your journey: